How to make AZ-Nunchuk
Items needed
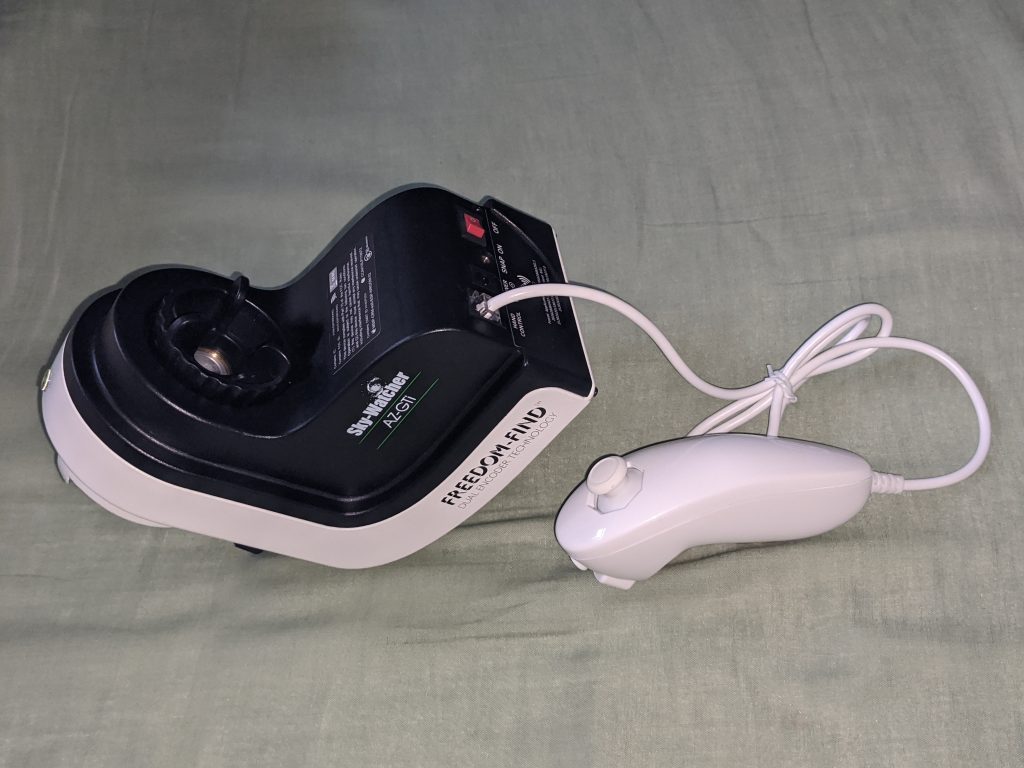
Nintendo Wii Nunchuk
arduino pro mini board or compatible clone
There are two versions of Arduino pro mini, 3.3V 8MHz and 5V 16MHz. 3.3V is preferble because both serial commucation to AZ GTi and power surpply for Nunchuk are 3.3V. However both of them are also 5V compatible so 5V version works perfectly.
Piezo buzzer without circuit. With wire. Diameter should be less than 20mm.
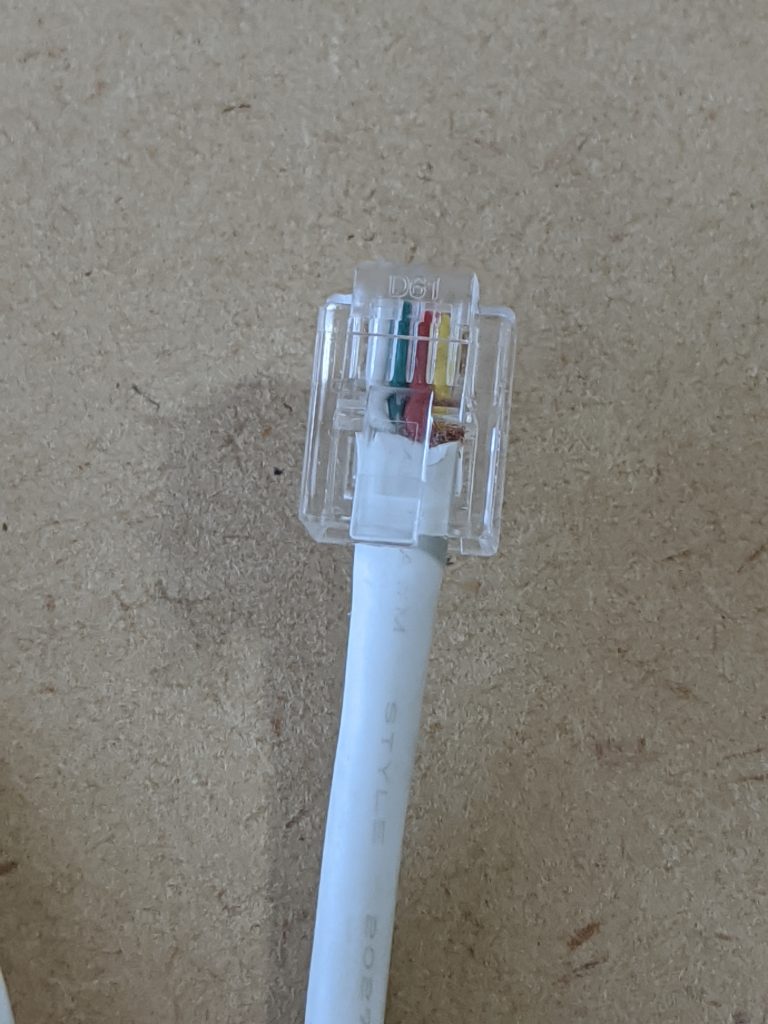
RJ12 6P4C moduler plug.
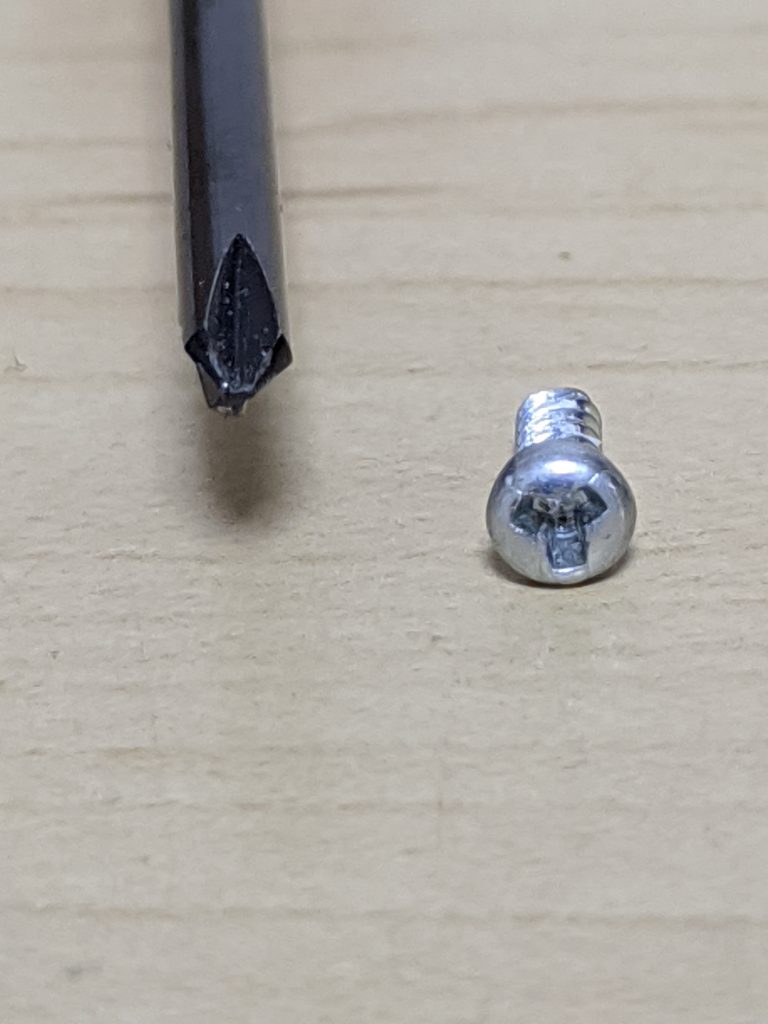
Y-shape special driver, to open Nunchuk
Solder and Solder Iron
Moduler cable cramper tool
Write sketch to Arduino
I uploaded sketch here. (Updated on 2025/Feb/8 for AZ-GTi latest firmware)
github.com/naokiueda/az-nunchuk
This is far from “elegant codes” those are often seen in github. However, I upload code which is working. I may clean and align code and upload better code in future, though.
You may need to install “Float64” library to compile.
You can download zip file from
https://github.com/mmoller2k/Float64
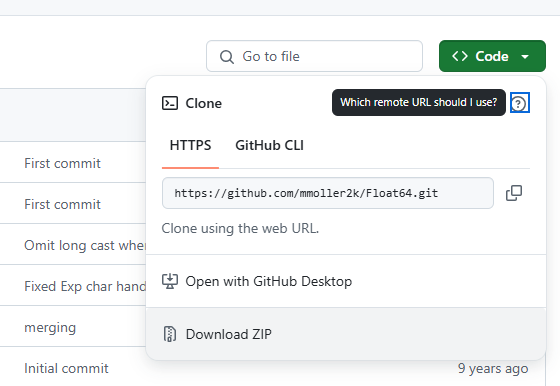
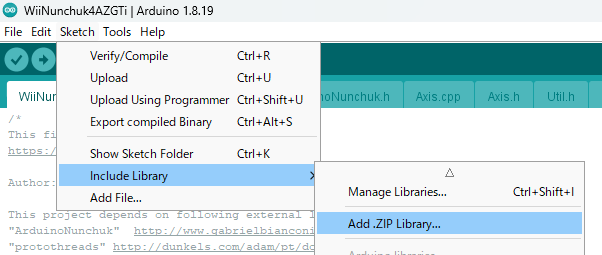
Then in Arduino tool, “Sketch” menu -> “Include Library” -> “Add .ZIP Library”, and select downloaded file.
Write Sketch to “Arduino Pro Mini” need USB-Serial board.
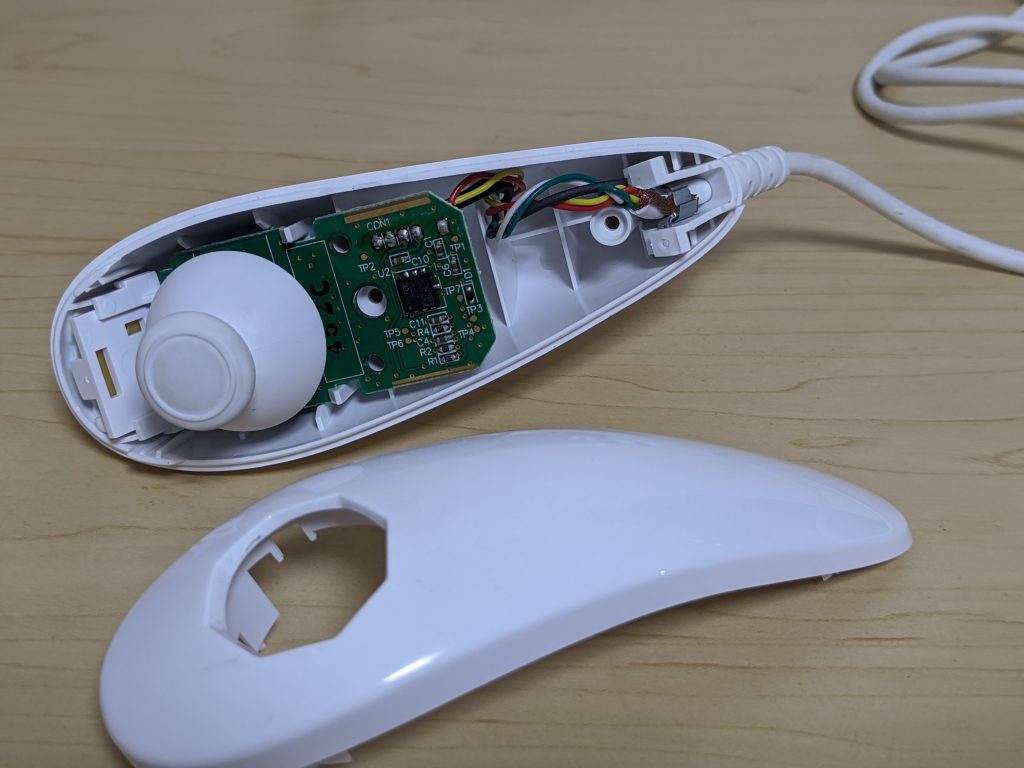
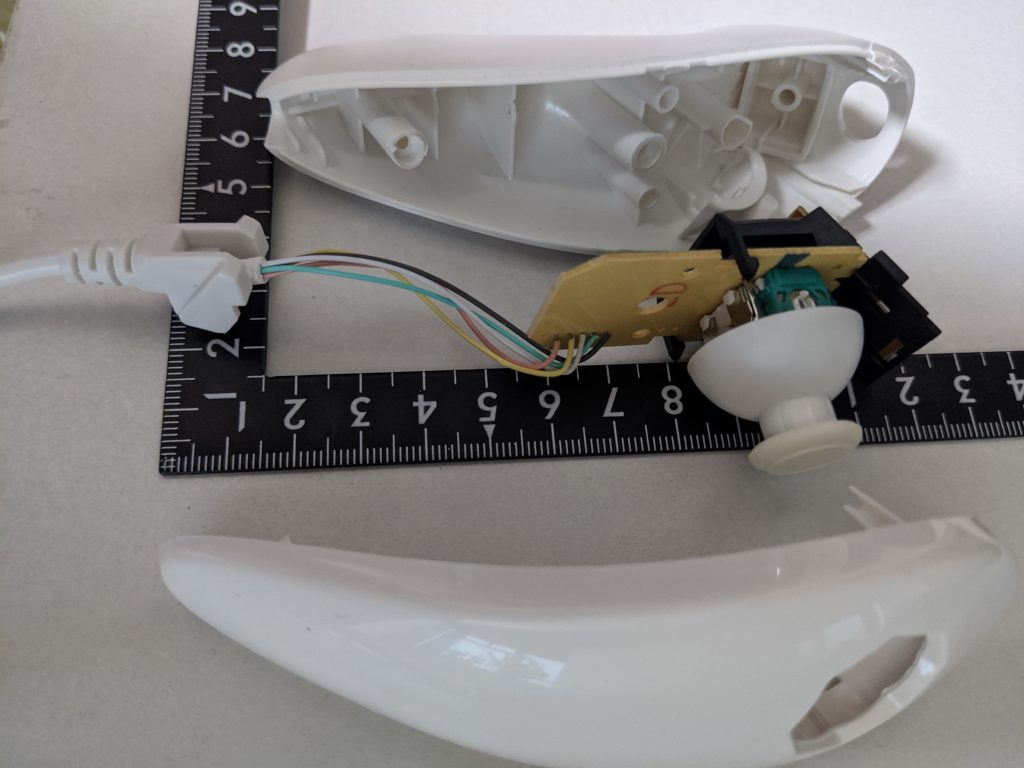
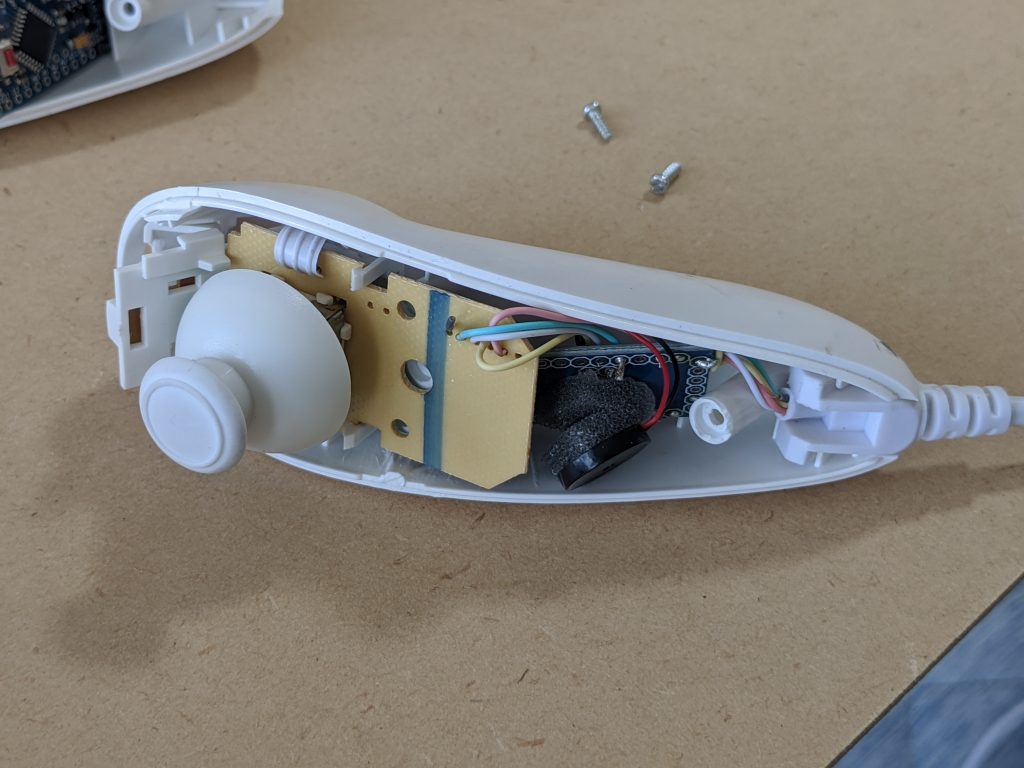
Dissolve Nunchuk
Nintendo wii nunchuk use Y-shape screw, and you need special driver for it.
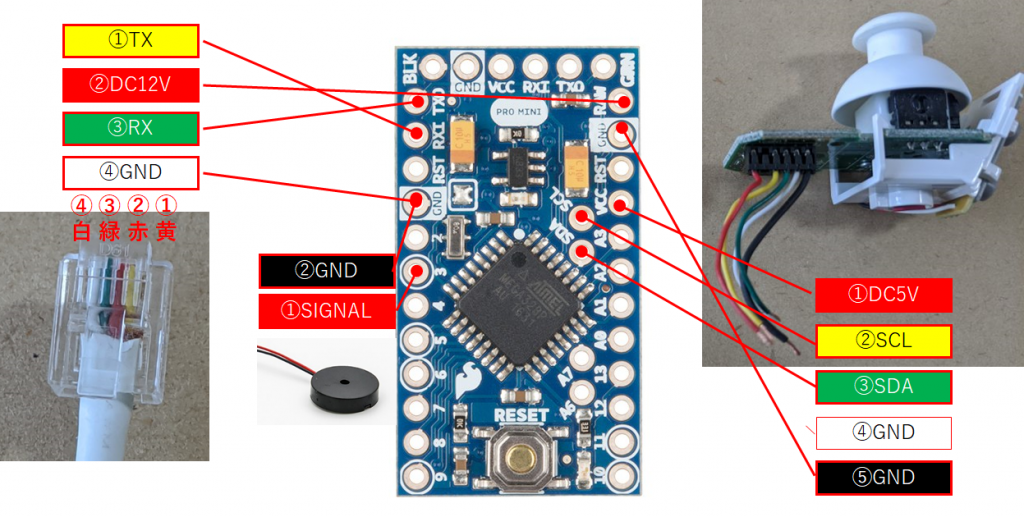
You need to use RJ11/RJ12-6P6C/6P4C moduler plug. You may use 6P4C moduler cable, but I recommend to use soft cable. Round type moduler cable has strong (hard) wire inside, and it will be difficult put them inside Nunchuk body.
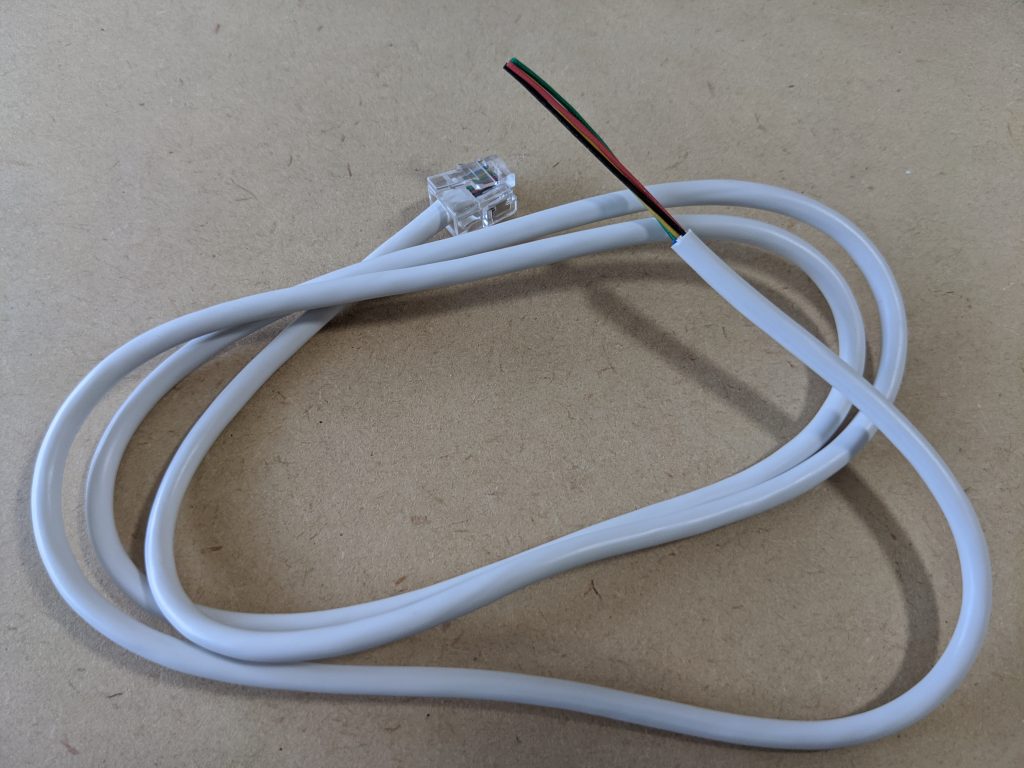
In this page, I don’t use moduler cable. In stead, I cut Wii-Connector from original Nunchuk cable, and replace it with 6P4C moduler plug. Wii-Nunchuk’s original cable are soft and flexible because they must be designed to gaming purpose.
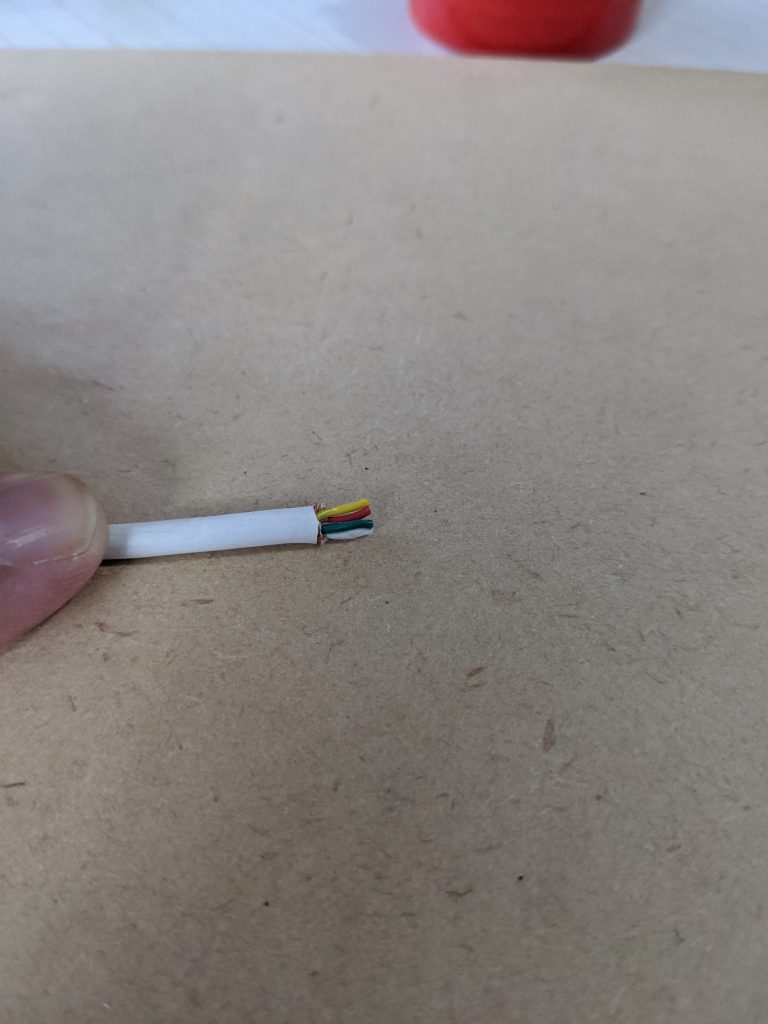
Cut Wii-connector and peel about 6mm(=1/4 inches). Cut shield cupper wires.
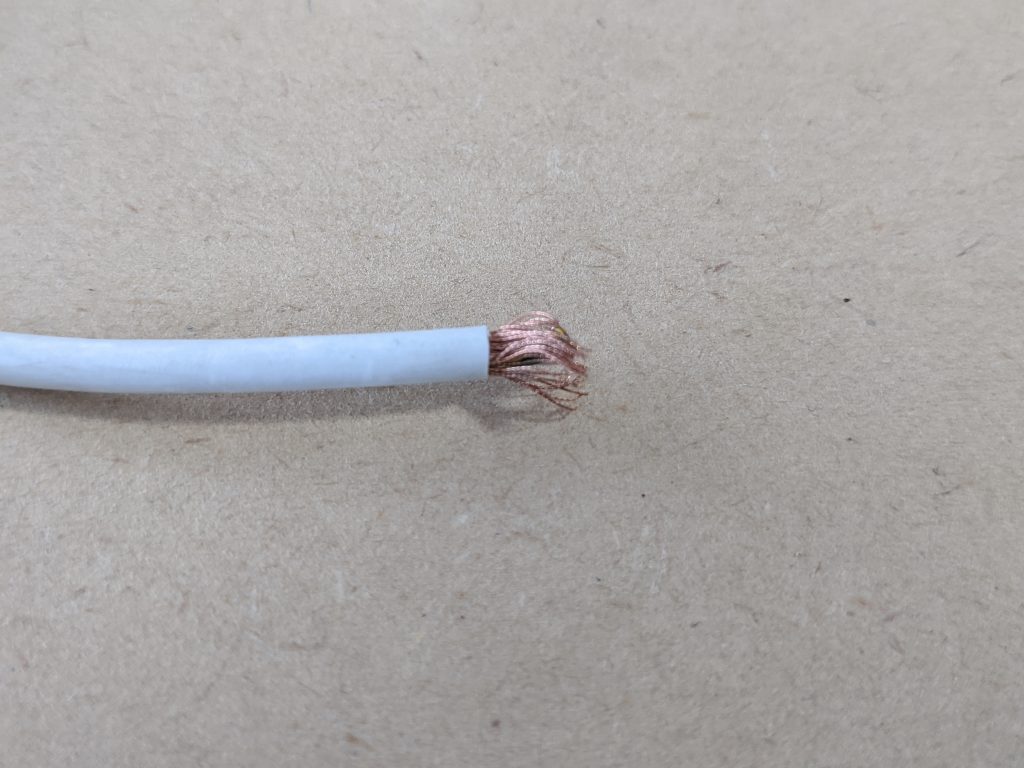
There are 5 wires, Red, Black, Yellow, Green, and White. But cable does not have Black (Black is connected to Shield wire), and only has 4 wires.
Allign these 4 wires, as straight ans parallel as possible.
I recommend align in order of following for convenience in later process.
Yellow
Red
Green
White
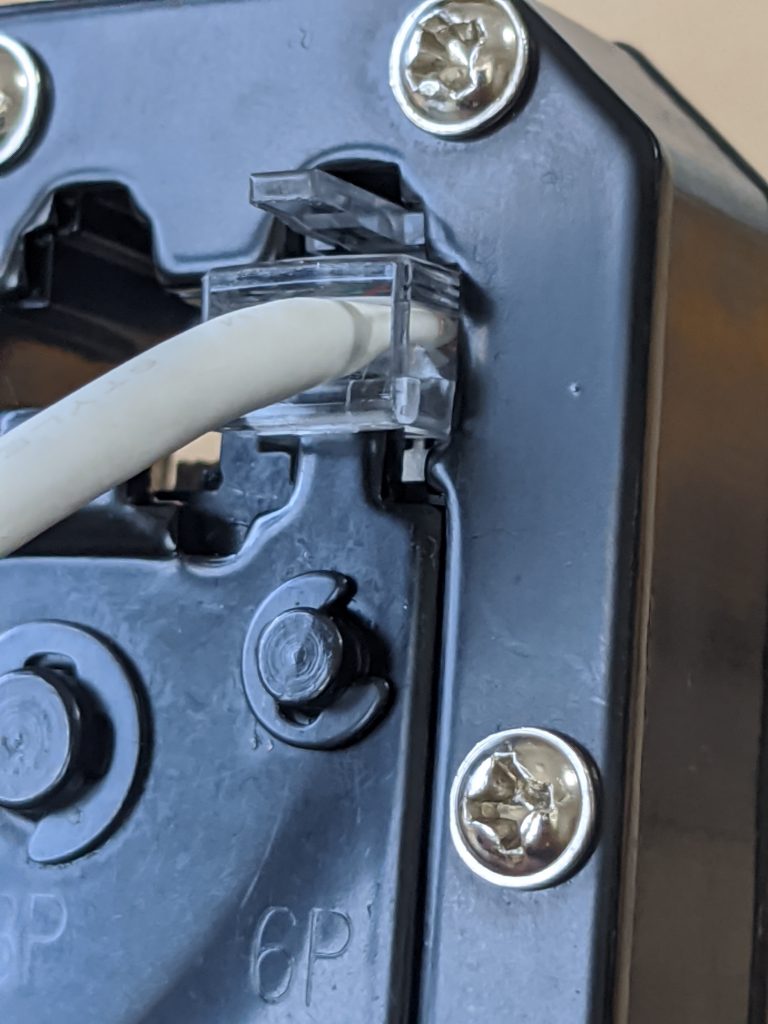
Insert these wires into 6P4C plug, and Crimp it with Crimp tool.
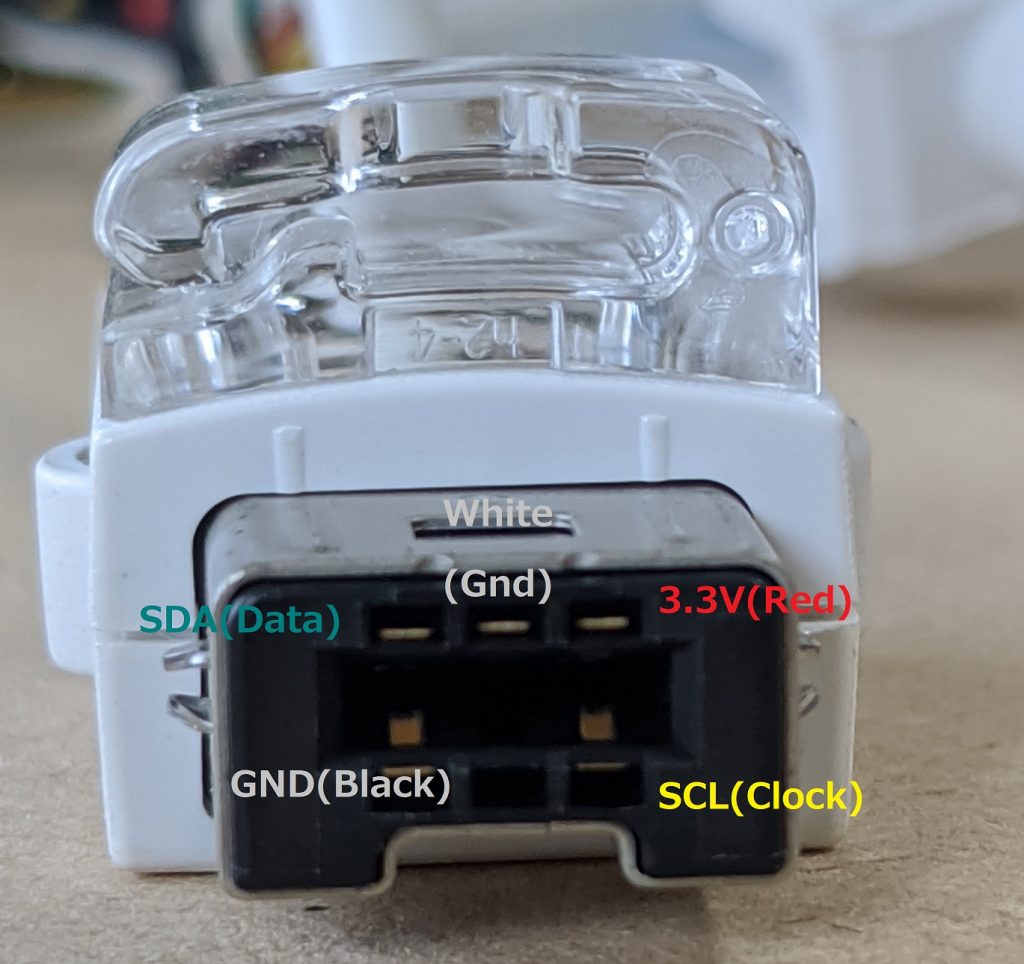
Yellow (AZ GTi)Tx
Red DC12V
Green (AZ GTi)Rx
White Gnd
If you use non-authentic Nunchuk, cable color may differ.
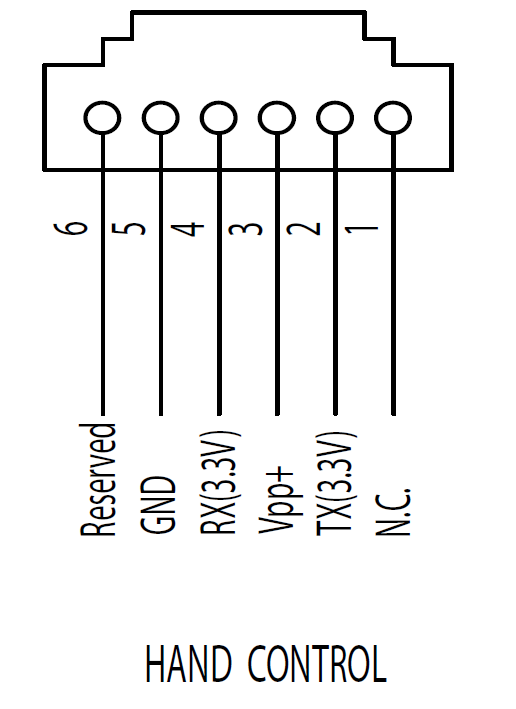
AZ GTi Hand controller has following pin assign.
Remove wire and board from body.
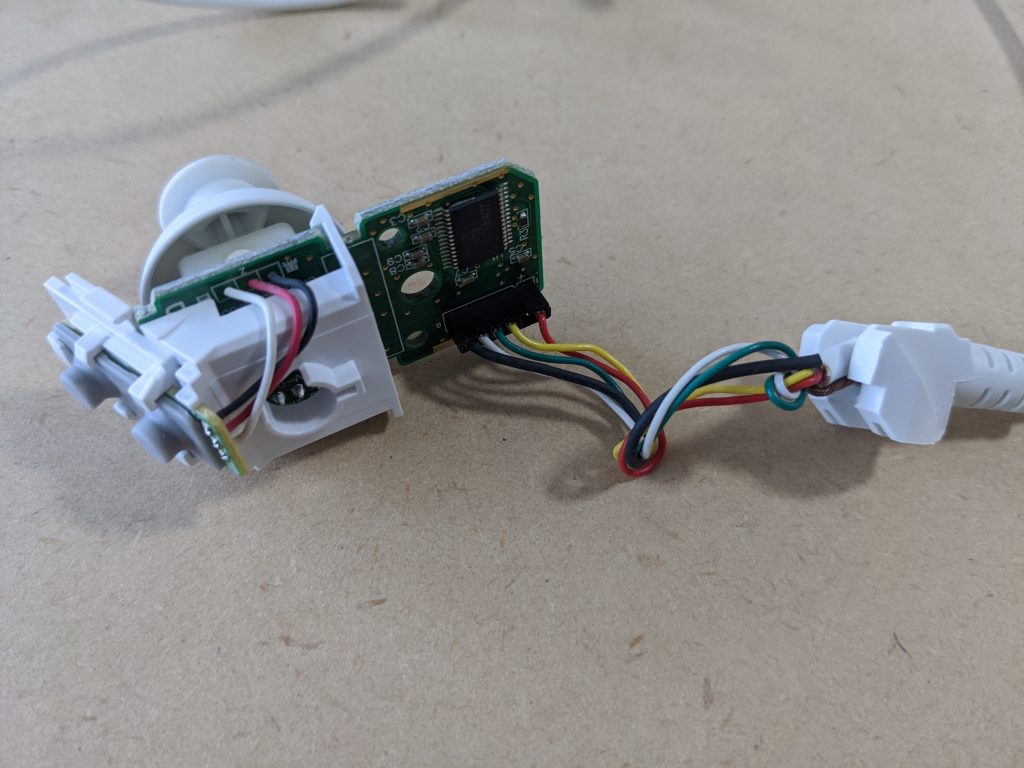
Caution: Cut wire about half and half.
If one side is too short, Arduino may not fit inside body.
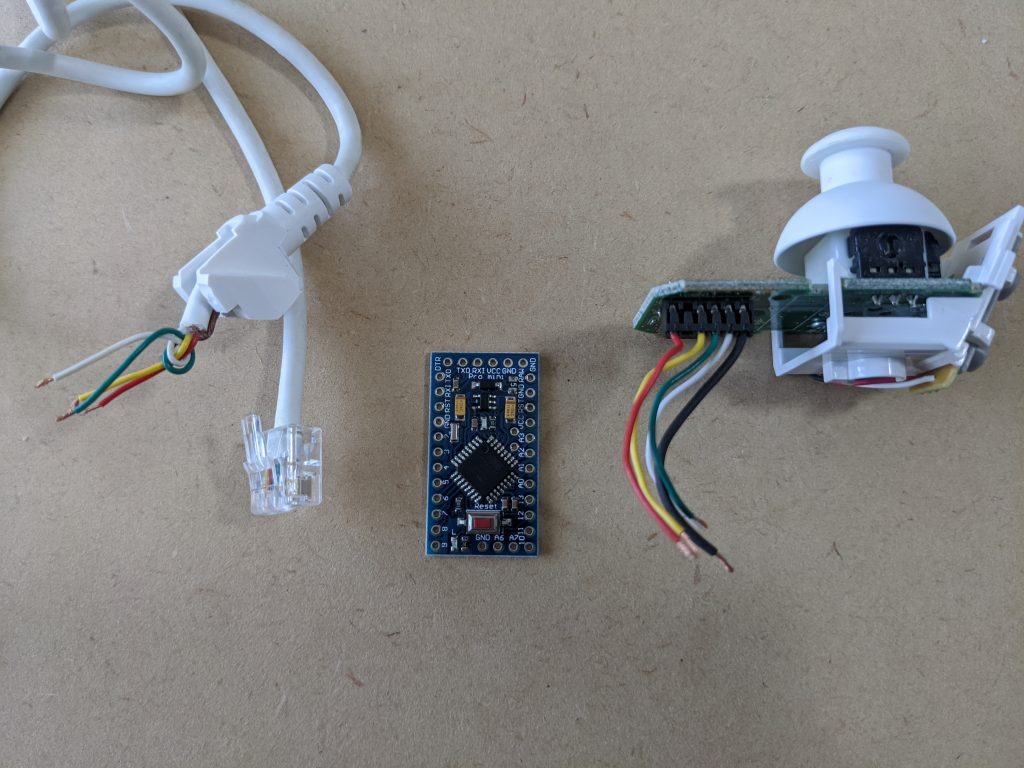
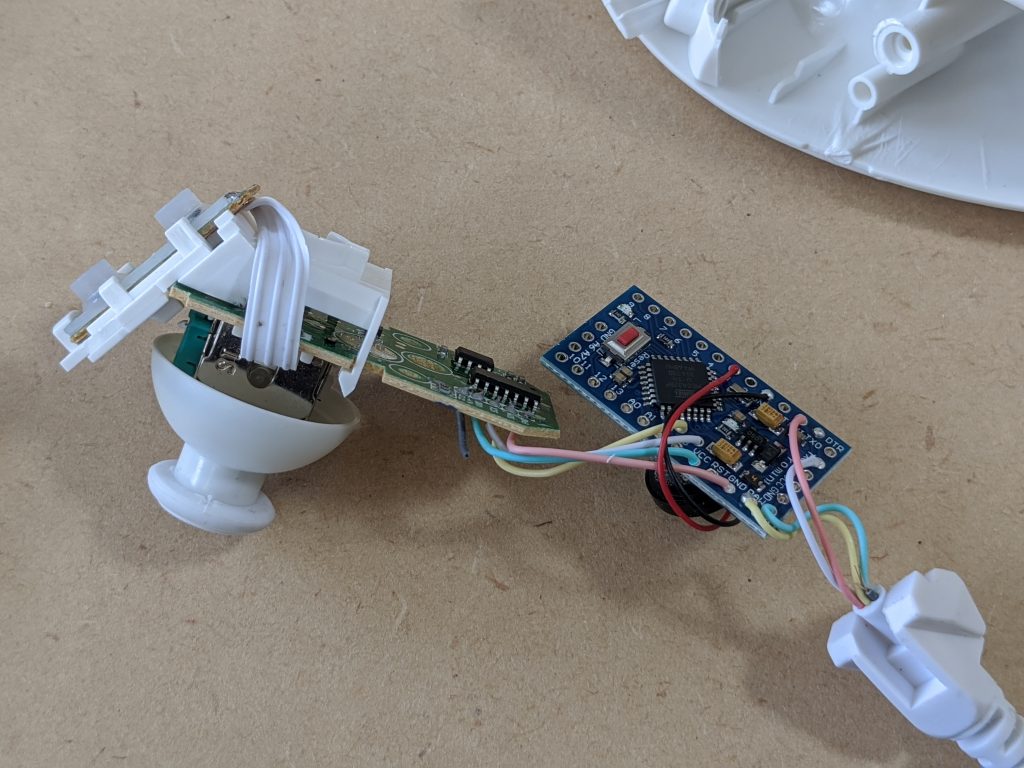
Solder wires directly on Arduino board. If you use pin-header, it may not be fit inside body.
Solder wires as following
In the sketch(Arduinot program), I assign buzzer to pin-3.
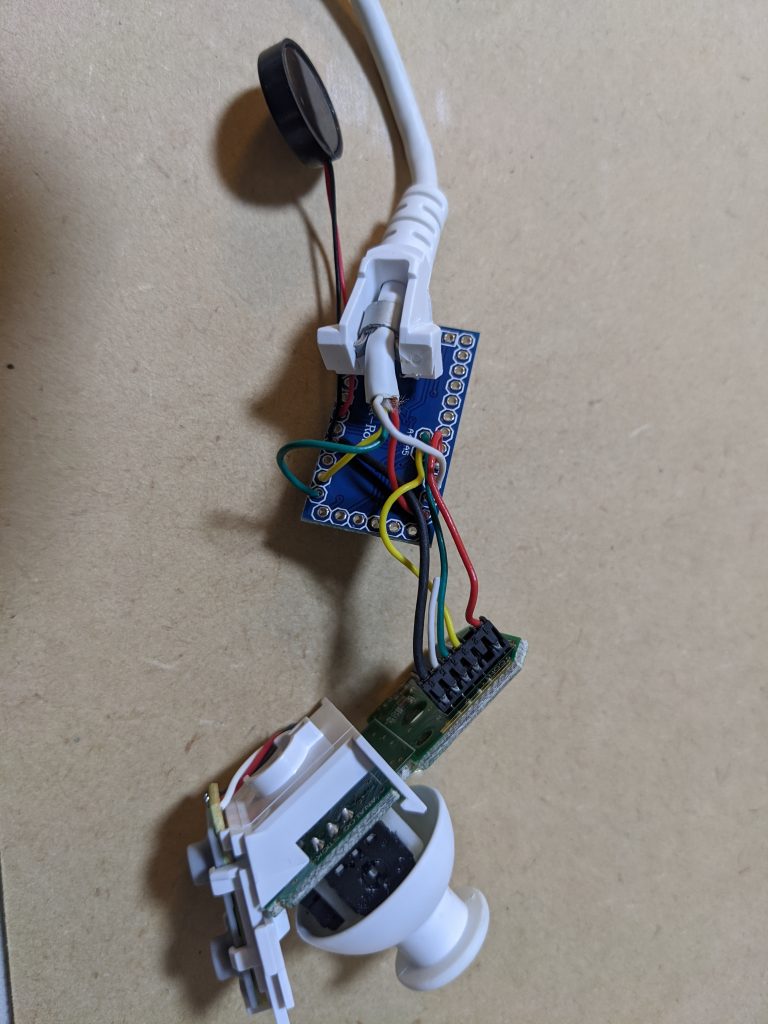
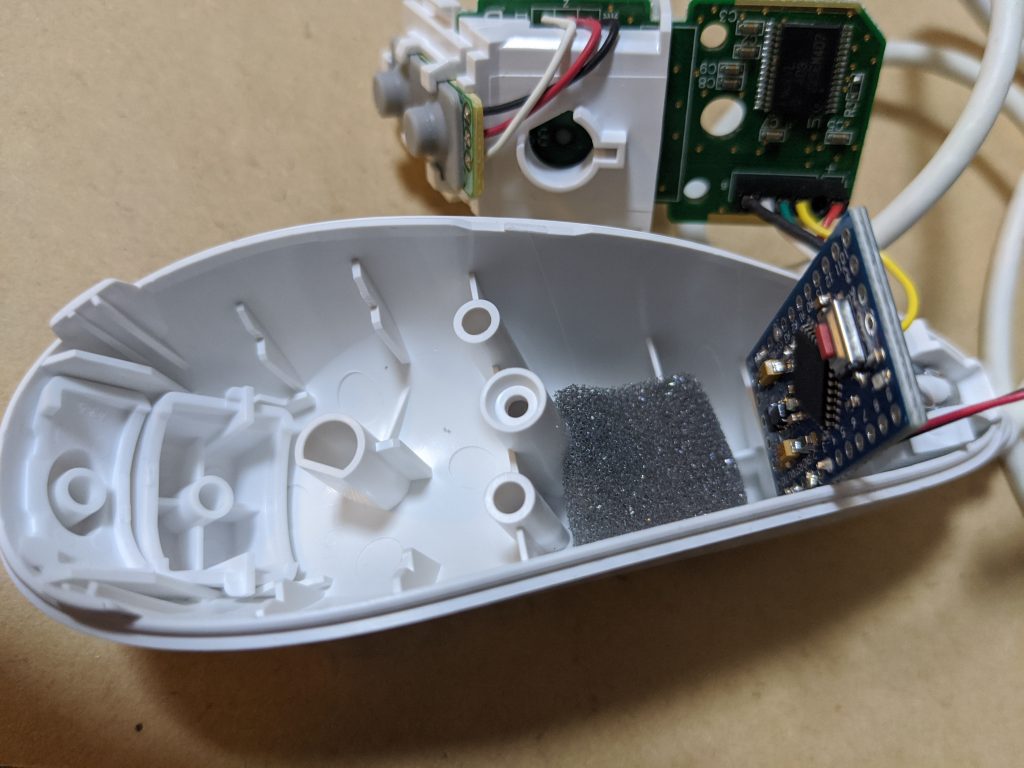
To avoid clatter sound, use anti-burn sponge to fix arduino.
Set cable boots, arduino, then place Nunchuk board.
Also use sponge to fix buzzer.
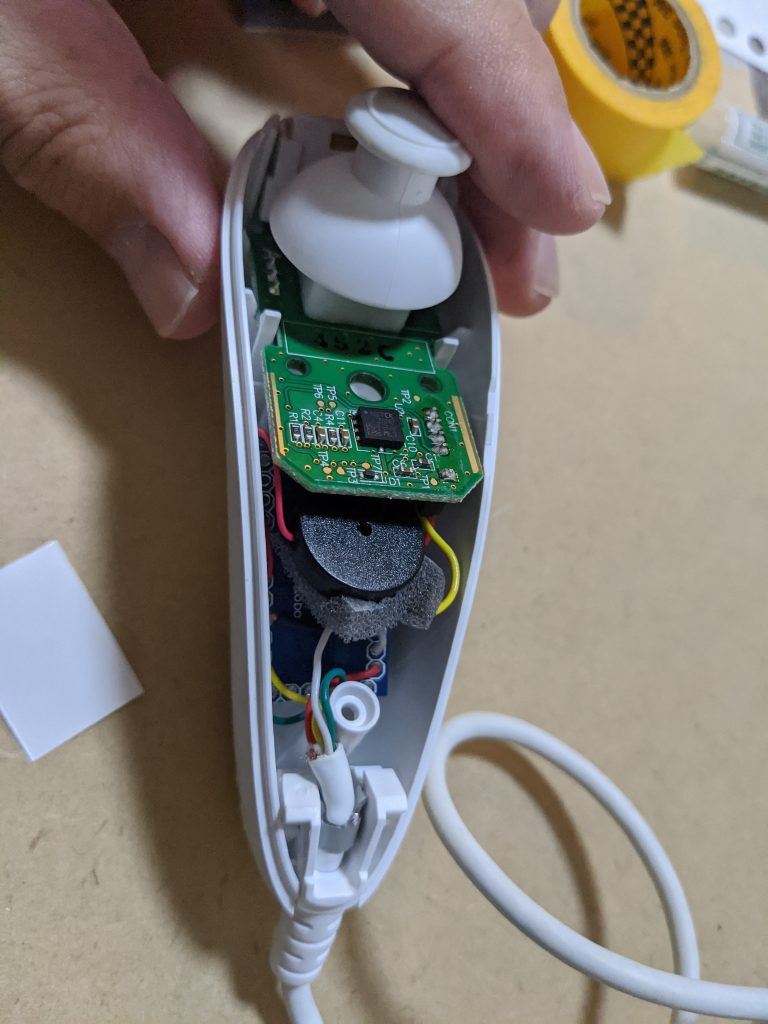
Set top cover and screw it.
In case if you use compatible clone Nunchuk
I bought several types of clone nunchuk. Most of them has shorter wire inside, and that makes “fitting”, – put arduino inside body- , difficult.
Also, wire color may vary, so you need to confirm which wire has which pin, SCL, SDA, 3.3vDC, and Ground BEFORE you cur wires.
This is AZ-Nunchuk modified on clone Nunchuk
This is AZ-Nunchuk modified on clone Nunchuk
Sell it?
Unfortunately, I can’t sell it. I can’t sell someone’s (Nintendo Corporation)product with my modification. That violate their intellectual property. However, you can buy NUnchuk and modify by yourself for your usage.
Therefore, I opened my arduino program and how to make it.
Please enjoy your electronics work.
About Usability
About Usability
It is very convenient because I made what I want.
Especially in EQ mode, AZ Nunchuk take care of tracking, so I do not need to use not even connect SyncScanApp at all.
I only use SyncScanApp when I want to use GOTO functionality.
Known Issue
SyncScanApp use Motor Protcol. AZ Nunchuk also use Motor Protcol. ANd AZ GTi looks only handling with one of them at the same time.
In some case, sending command from both may cause motor hang-up, and you need to power-off and on again. (And Alignment, too)
Especially, when SyncScanApp is
– in tracking in Alt/Az mode
– in displaying information, such as Ra,Dec,Position, etc., real time
SyncScanApp is keep sending command every second. In this case, using AZ Nunchuk may cause hangup.
So when you Operate AZ Nunchuk, please keep following in mind, so you can use it without trouble.
– Disable “Tracking” in SyncScanApp
– Do not display “Info” in SyncScanApp
– Do not use move button in SyncScanApp and Nnnchuk at the same time
- Do not operate Nunchuk white “GOTO” movement